
Neutral Buoyancy is Within Reach - A Guide to Diving and Shooting with The Avelo System


When people ask me what my #1 tip is for anyone wanting to get into underwater photography, I keep it really simple. It certainly isn’t a secret formula of manual exposure settings or a miracle piece of kit that perfectly illuminates all their shots. Not even close . . . to me, the most important skills to master before becoming a photographer underwater are all diving skills. And at the top of that list? Buoyancy control.
Being properly weighted, honing in on your ability to effortlessly hover above the reef and maintaining full control when approaching skittish subjects are all critical skills to be keep both you and the animals/reef line safe while diving with a camera. Having this control in the water will also give you the mental space to focus completely on composing and creating beautiful images.
So naturally, when I first read about the technology of the Avelo system and it’s promise for perfect buoyancy, I was intrigued. I later jumped at the opportunity to try it out when we offered some pop-up certification classes last week. Keep reading to learn more about my personal perspective on diving, and eventually shooting wish, this new system.

1st Impression
One of the first things you notice about this system is how light-weight it is compared to other recreational diving set-ups. In fact, the Avelo system averages 30 lbs less than traditional scuba equipment! While this isn’t necessarily a weightless system (I used 2lbs in a 3mm wetsuit) there is absolutely less bulk to this set-up which I greatly appreciated.
Because of the nuances involved with this system, certification is required for anyone wanting to try out the Avelo system. Referred to as Recreational Avelo Diver (RAD) Course, it comprises of an e-learn that takes roughly 1-2 hours to complete, a review with an Avelo instructor and 2 ocean dives where you complete several in-water skills.


As a dive professional it is always super humbling to feel like a beginner again. However, once I practiced setting up for a couple dives I now feel pretty confident in what to expect for future Avelo experiences. The gear is simple and intuitive, meaning that making the transition over from traditional kit isn’t as daunting as what one might think.

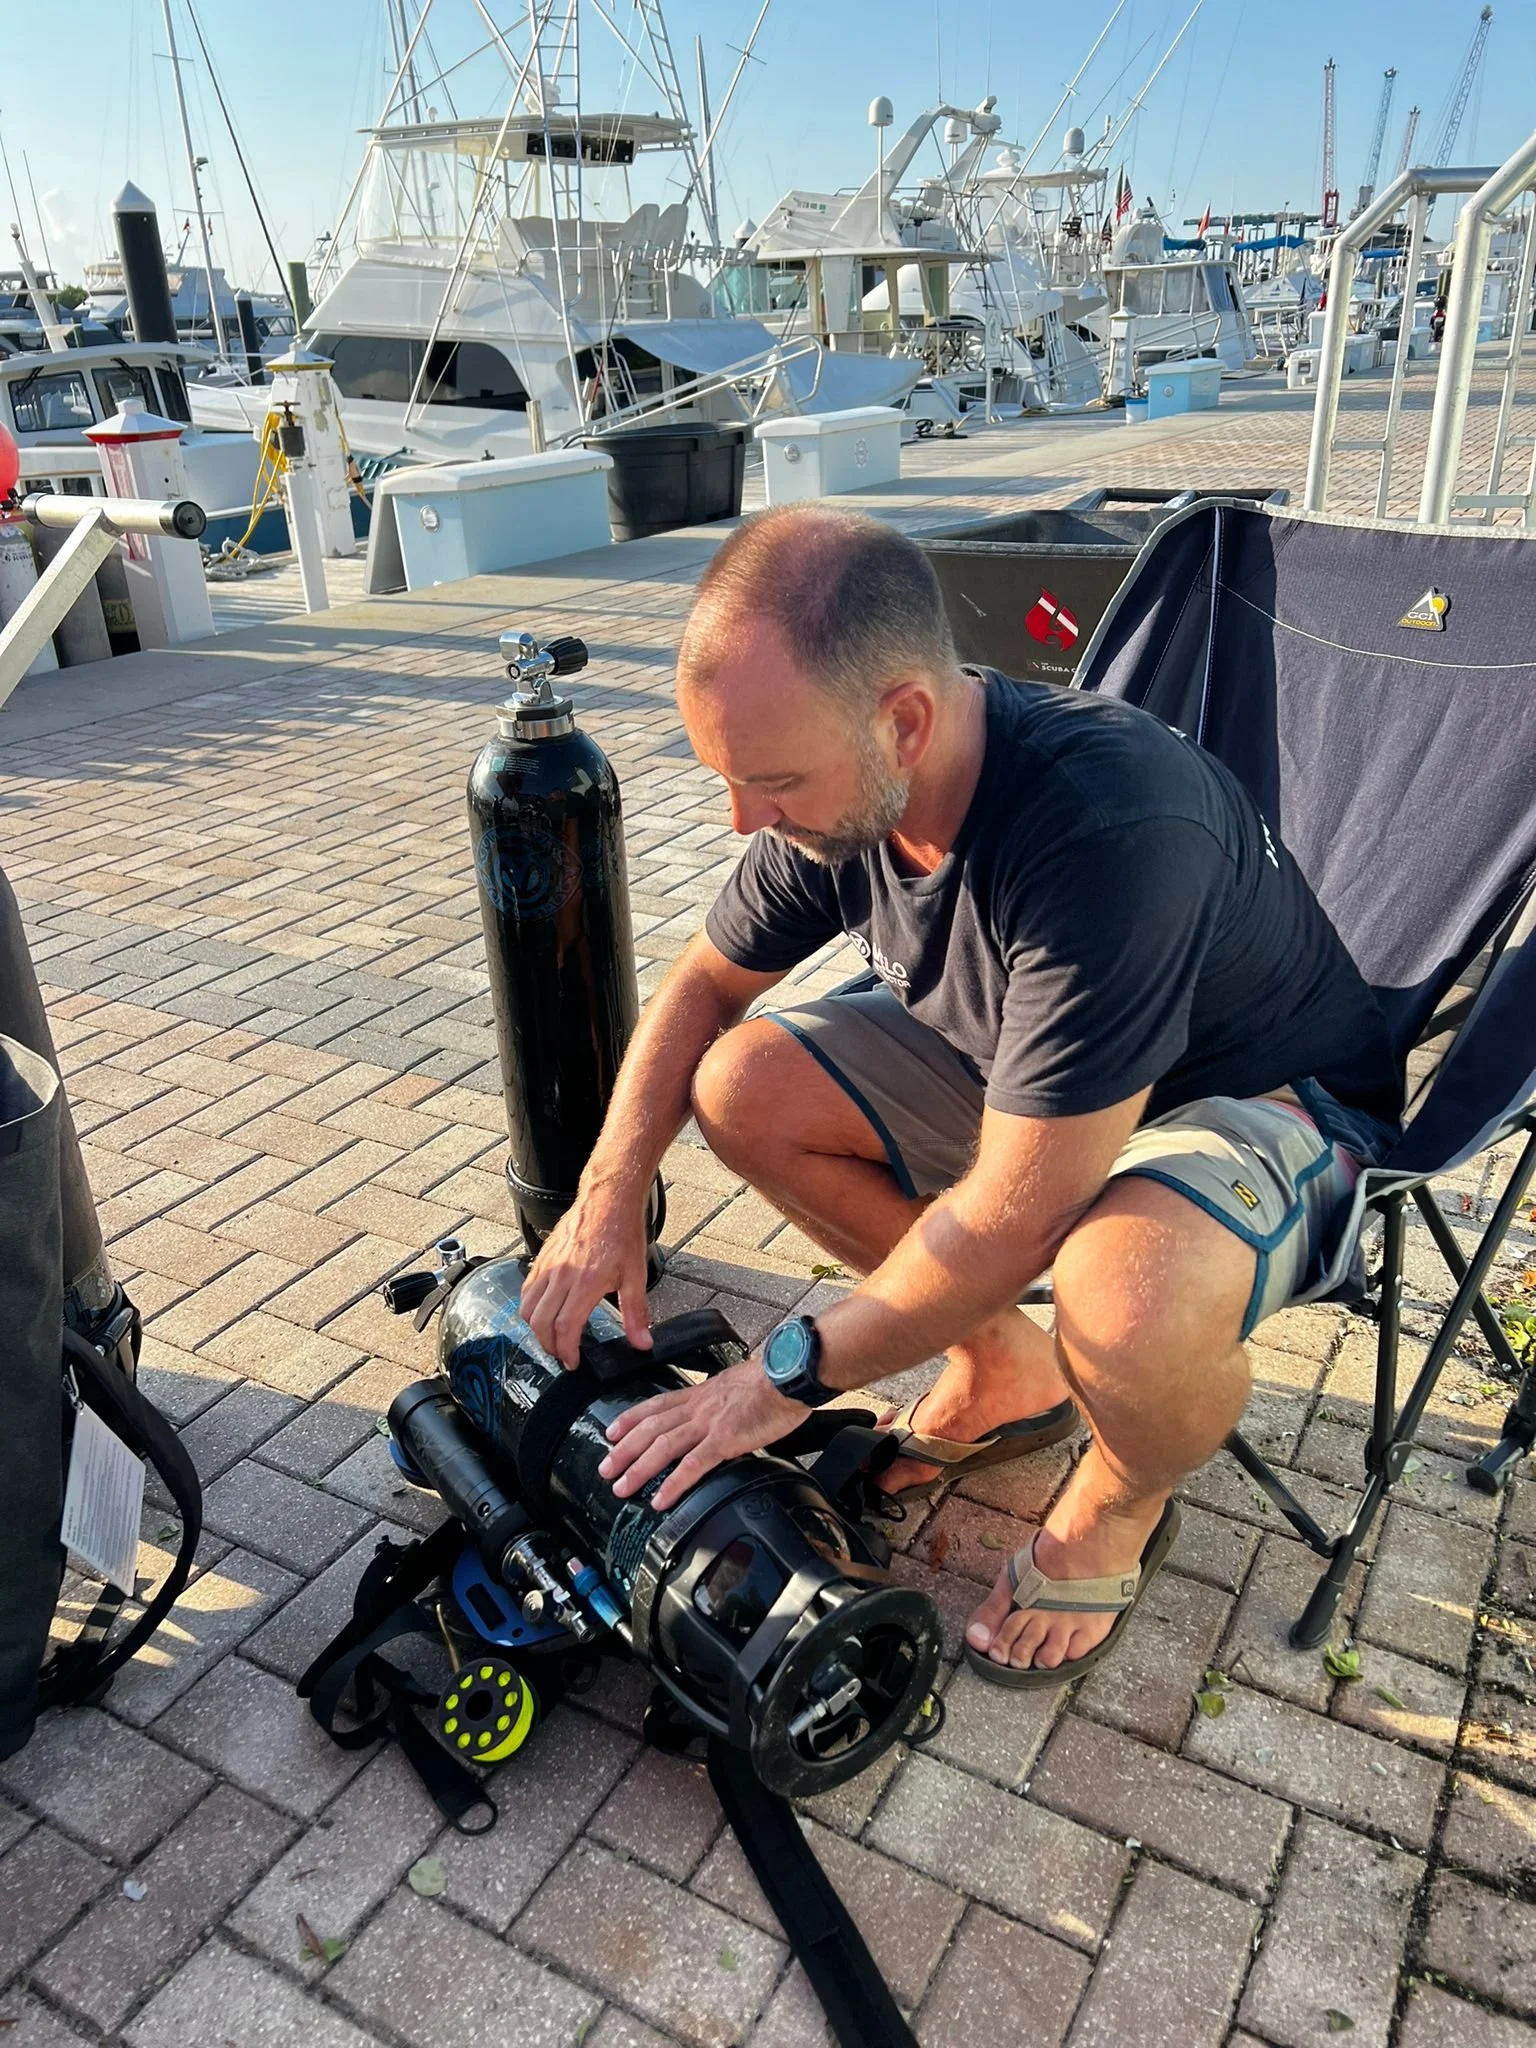
Avelo Set-up
This is a BCD-less system that comprises of a backplate and harness called a “jetpack.” This jetpack then connects directly to a pump that is responsible for letting water inside the hydrotank during your dive. The set-up also includes a battery pack for the pump that lasts several dives, an integrated SMB for safety at the surface, and plenty of loops for d-rings and attachments. You can add additional weight tucked in along the crossbars at the base of the tank or on the waist strap.
A high pressure DIN regulator is also a requirement for use of the system since pressure increases as you let water into the tank. The last thing you will need is a computer that allows for Avelo calculations since increased pressure affects your PSI, and there is a formula to calculate your air remaining. While this may sound complicated at 1st, it is really pretty straightforward in application and our Avelo instructor provided all the tools necessary.
I know what you’re thinking . . . so how does it work exactly, and does it really deliver on its promise of perfect buoyancy?
The analogy that instructor Ben shared with me that really resonated was comparing the hydrotank to a submarine. I’m likely overly simplifying this, but in general a submarine sinks below the surface by pumping water into ballasts, which increases their density and causes a descent. On the flip side, in order to return to the surface, a submarine releases water from its ballasts to become less dense and gradually rises to be able to float again.
The hydrotank works very much in the same fashion. This is preferable to controlling your buoyancy with air in a BDC for a couple reasons: first. air expands as you rise in the water column which can lead to a rapid, uncontrolled ascend. With the water adjustments, the changes are more gradual and you will have to kick to ascend, keeping you in control the entire time. Secondly, because the weight of the water is helping you descend, and keeping you neutrally buoyant throughout the dive, you are able to dive with less lead despite the system also being lighter. If you need to be heaver at depth, you just add more water to the hydrotank.
I personally loved being able to drop some weight while also having a lightweight tank on my back. I am someone who likes to be as light as possible in the water as I find it helps with hovering and getting in close to my subjects without having to lie all over the sea floor for stability. I only needed one pump of water while at depth, so I also didn’t feel the pressure of task loading - even when I later introduced my camera into the mix. I stayed neutrally buoyant the entire dive without having to fuss with the pump too much, and it was a great feeling.

System Maintenance
Cleaning the system after diving is no more effort than flushing out a BCD. You simply submerge the fully assembled hydrotank and pump into a fresh water bin and run it for one cycle, then purge.
After completing my RAD course I decided to schedule one additional day of diving to try out the system, this time bringing my favorite dive buddy along with me: my camera!
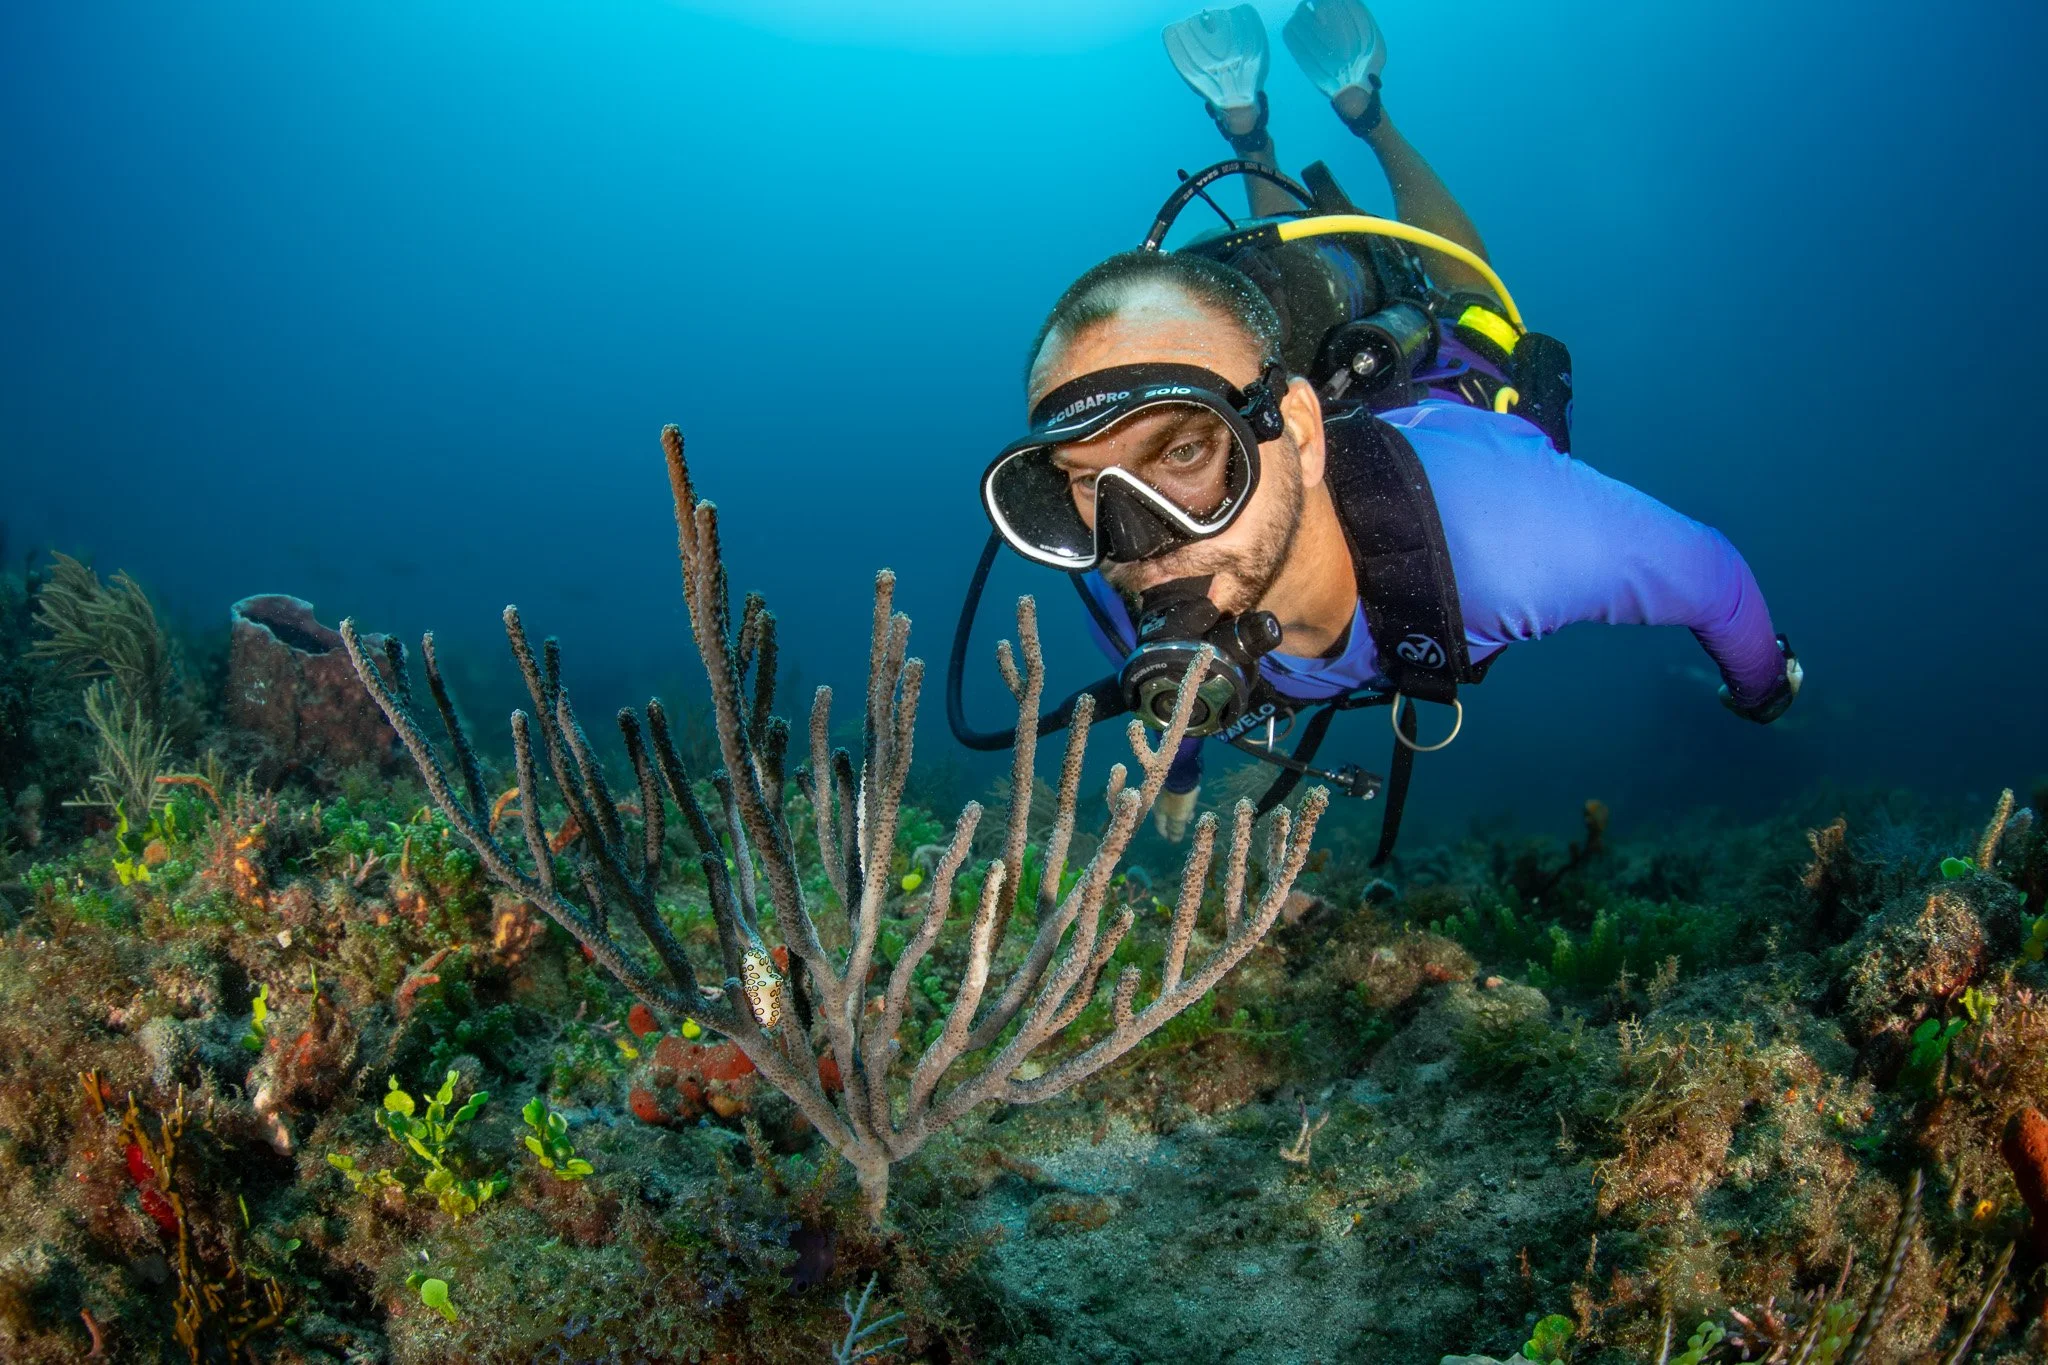
My rig is anything but lightweight and streamlined, so I knew this would be the ultimate test of the system. My typical wide-angle set-up is roughly 24 lbs in weight. Though my camera is large and heavy, I do have the buoyancy of the system pretty well figured out with float arms and as a result, it proved not to be an issue underwater. My primary concern was actually how I would fare at the surface with the added weight. To my surprise It was not too challenging and I never felt like I was struggling to stay afloat. Out of full transparency we were out on a flat calm day, and I like to consider myself a pretty strong swimmer. But to be honest, if seas were rougher, I would simply orally inflate my SMB and use it as extra support.

I am grateful to fellow Avelo student Tami for grabbing this go-pro shot of me underwater diving Avelo with my camera. You can see I was able to comfortably hover above the seafloor, maintaining a nice horizontal position, even with my massive rig in tow.
So to answer the burning question, who is the Avelo System for?
Anyone looking to trim down the weight of their kit. Long walks for shore entries or even lifting yourself up onto the back of a rocking boat in heavy gear at the end of a dive can be cumbersome; anyone looking for increased comfort here would love this system. I personally have already referred it to a couple friends with back problems who are excited to try it out.
I also feel this system is excellent for newer divers that have not yet dialed in buoyancy control with their lungs. If you find yourself going in overweighted just to be able to descend, then having to inflate and deflate your BCD at depth, then this will almost instantly help you overcome those challenges. Because the changes are minimal and very gradual with the bladder system in the hydrotank it also emilites the risk of a rapid ascent and allows for a slower descent upon entry, great for anyone with equalization issues.

Instructor Ben showing off his buoyancy control just beneath the surface. Anyone who has struggled to stay down on a safety stop with an empty tank knows how challenging this can be! In fact, your 1st in-water skill during the RAD course is hovering at 18ft for 3 mins. The system makes this truly effortless.
Who may this not be for?
While not impossible, it is more challenging to descend quickly since you enter the water neutrally buoyant and use the weight of water gradually entering the hydrotank to slowly descend. So in scenarios where you need to make a negative entry in heavy current, you would need to dive with extra weight.
Another consideration is you do need to work to stay afloat at the surface after your dive, more so than divers with traditional BCDs that you can simply inflate. The kit comes with a built-in safety sausage that you can wear as a vest, but know that if you’re carrying extra weight or gear, this could be a challenge, particularly for a tired diver at the surface.
Lastly, while I really enjoyed diving with the system, it would be a significant investment to switch over for someone like me who has already invested so much in their current gear set-up including BCD, reg and tanks. And more importantly, it is unfortunately not currently offered in the color pink . . .
I see myself mostly using the Avelo system for travel. I have already done some research on which shops offer the Avelo set-up and have plans to dive with it in California next month and in the Keys in October. This means the only kit I will need to travel with is mask, fins and snorkel . . which allows me more luggage space for camera gear!
Overall the system is super intuitive, easy to pick-up and a lot of fun to dive. I strongly encourage you to check it out when we regularly have the offering . . . stay tuned for more details!
Safe Diving,
Grace


